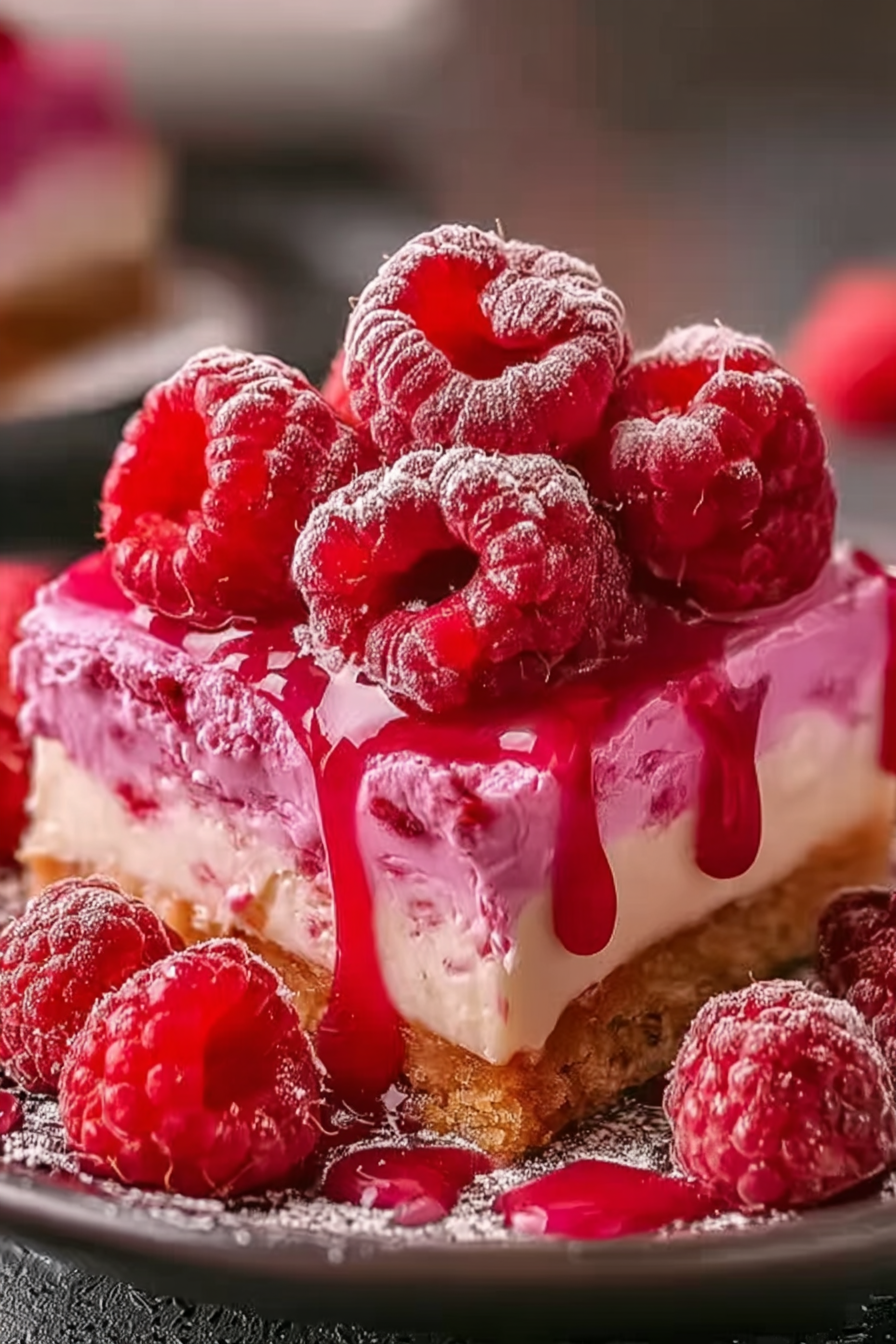
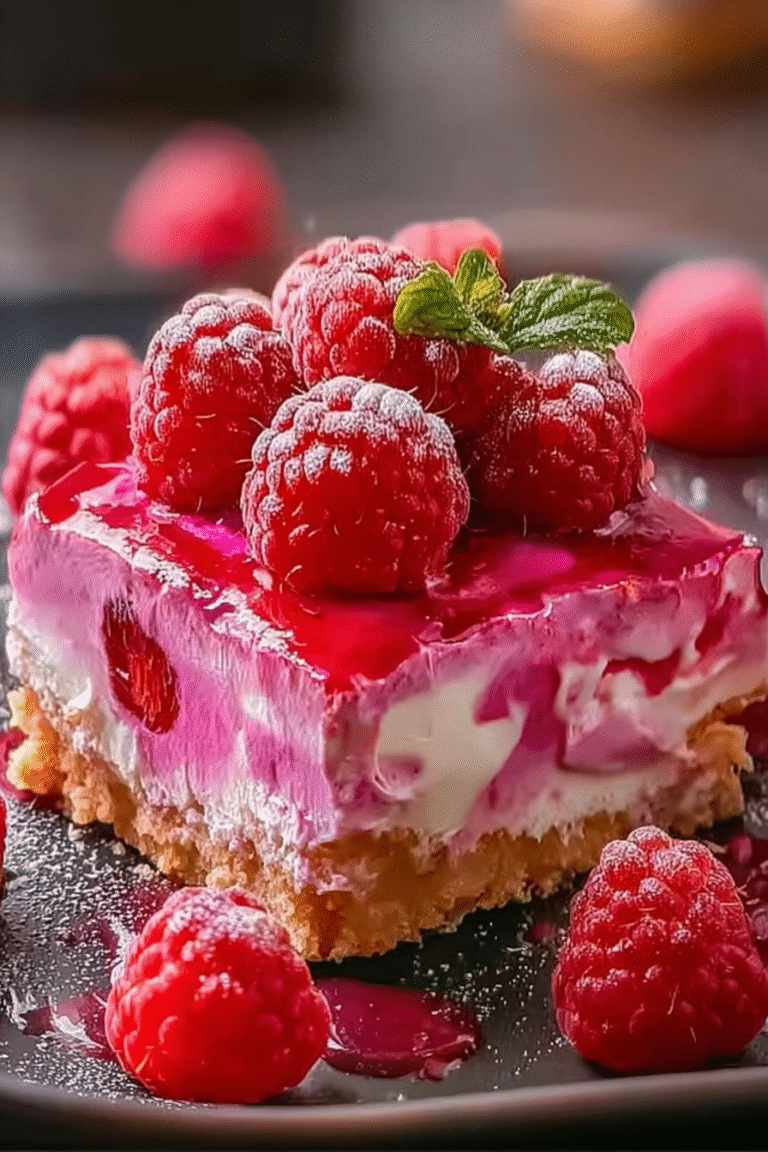
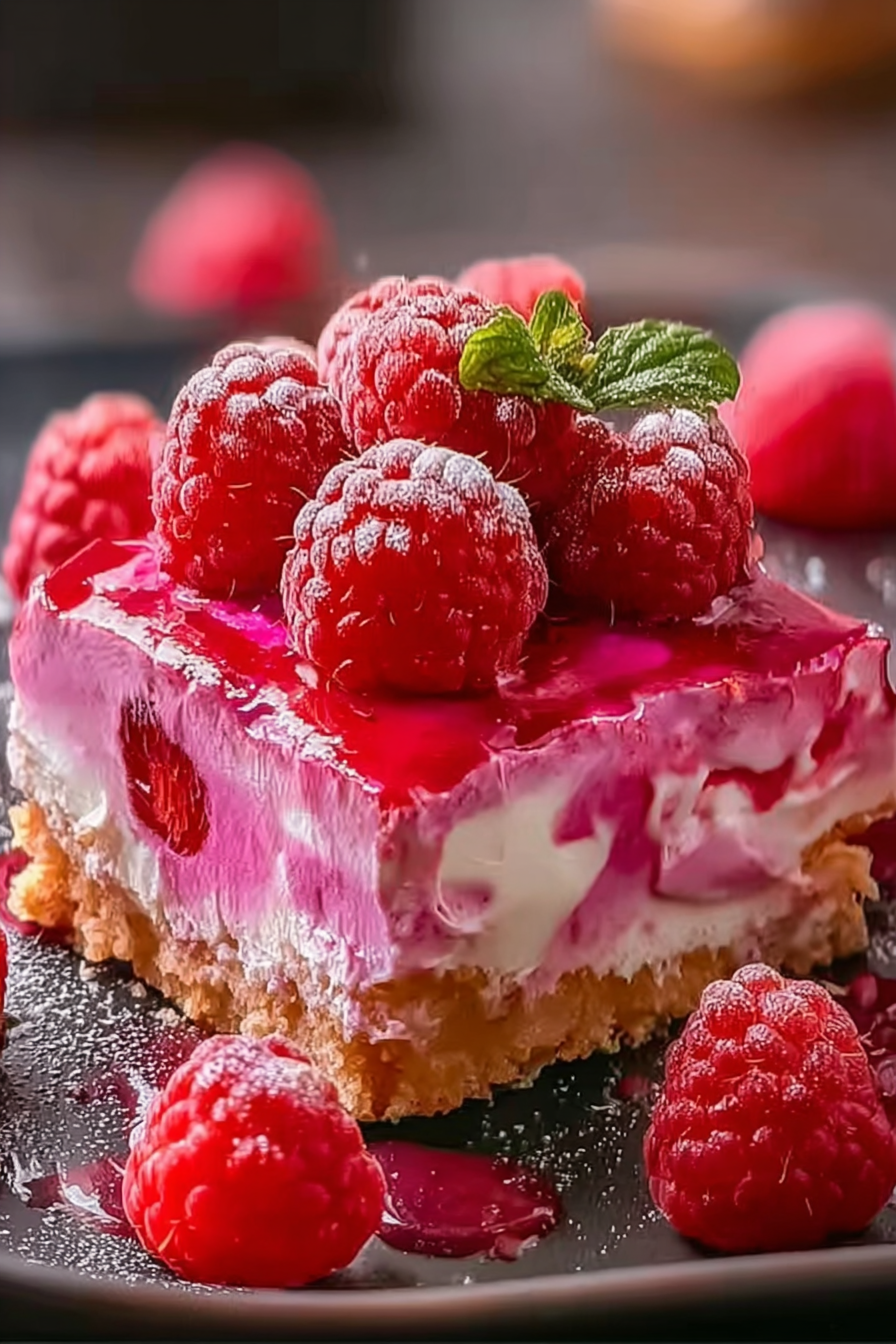
This Pink Velvet Raspberry Cheesecake is a symphony of flavors, a swirling masterpiece of creamy cheesecake, bright raspberry, and the subtle hint of velvet that makes it truly special. The vibrant colors are so inviting. Every mouthful is a taste of pure joy.
It’s more than just dessert; it’s an edible hug, perfect for celebrations, a romantic dinner, or just a “treat yourself” kind of day. Imagine the tangy raspberries dancing on your tongue, the velvety smooth cheesecake melting in your mouth – pure bliss! I can’t wait to share this recipe with you.
- This cheesecake combines the richness of velvet cake with the tang of raspberries.
- The recipe is designed to be approachable for bakers of all skill levels.
- Its striking pink hue and elegant presentation make it the perfect dessert.
- Enjoy this cheesecake chilled for a refreshing and indulgent experience anytime.
Ingredients for Pink Velvet Raspberry Cheesecake
Here’s what you’ll need to make this delicious dish:
The full ingredients list, including measurements, is provided in the recipe card directly below.
How to Make Pink Velvet Raspberry Cheesecake
Follow these simple steps to prepare this delicious dish:
Step 1: Prepare the Velvet Cake Layers
Preheat your oven to 350°F (175°C). Grease and flour two 9-inch round cake pans. In a large bowl, whisk together the flour, sugar, cocoa powder, baking soda, and salt.
Step 2: Mix the Wet Ingredients
In a separate bowl, combine the vegetable oil, buttermilk, eggs, vanilla extract, and red food coloring. Add the wet ingredients to the dry ingredients and mix until just combined. Be careful not to overmix.
Step 3: Bake the Cake Layers
Pour the batter evenly into the prepared cake pans. Bake for 25-30 minutes, or until a toothpick inserted into the center comes out clean. Let the cakes cool in the pans for 10 minutes, then transfer them to a wire rack to cool completely.
Step 4: Make the Raspberry Cheesecake Filling
In a large bowl, beat the softened cream cheese and sugar until smooth and creamy. Add the raspberry jam and mix until well combined. In a separate bowl, whip the heavy cream until stiff peaks form. Gently fold the whipped cream into the cream cheese mixture.
Step 5: Prepare the Agar-Agar
In a small saucepan, whisk the agar-agar powder with a quarter cup of water. Bring to a simmer over medium heat and cook, stirring constantly, until the agar-agar is completely dissolved. This usually takes about 3-5 minutes. Let it cool slightly, then gently fold it into the cheesecake filling.
Step 6: Assemble the Cheesecake
Place one velvet cake layer on a serving plate. Spread the raspberry cheesecake filling evenly over the cake layer. Top with the second velvet cake layer. Chill in the refrigerator for at least 4 hours, or preferably overnight, to allow the cheesecake to set completely.
Step 7: Serve and Enjoy
Slice and serve the Pink Velvet Raspberry Cheesecake chilled. Garnish with fresh raspberries or a dusting of cocoa powder for an extra touch of elegance. Enjoy every bite of this decadent dessert!
Perfecting the Cooking Process

To achieve cheesecake nirvana, timing is everything. First, prepare your raspberry puree to allow it to cool. Then, tackle the crust while the oven preheats. Finally, mix the cheesecake filling and layer everything with love and precision.
Add Your Touch
Feeling adventurous? Try adding a hint of lemon zest to the crust for a citrusy surprise. For a nuttier flavor, swap some of the graham crackers for crushed pecans or walnuts. Or swirl white chocolate into the filling for extra decadence.
Storing & Reheating
This pink velvet raspberry cheesecake is best enjoyed cold! Store it in an airtight container in the refrigerator for up to 5 days. While technically you *can* freeze it, the texture might change slightly. Eat it straight from the fridge for the best experience.
Here are some helpful tips for cheesecake success:
- Ensure your cream cheese is at room temperature before mixing to avoid lumps and achieve a smooth, velvety texture that melts in your mouth.
- Bake the cheesecake in a water bath to create a humid environment, which prevents cracking and ensures an even, moist, and creamy bake.
- Allow the cheesecake to cool completely in the oven with the door ajar to prevent it from collapsing and maintain its structure.
(Personal anecdote formated as paragraph subheading)
My cousin once declared my cheesecakes “better than therapy.” I’m not sure about that, but I’m pretty sure it beats folding laundry. Seriously, the joy this brings people is amazing.
Pink Velvet Raspberry Cheesecake: A Love Story
Okay, let’s be real. The name “Pink Velvet Raspberry Cheesecake” sounds like something a unicorn would order at a fancy bakery. But trust me, this dessert is more than just a pretty face. It’s a flavor explosion wrapped in a cloud of creamy goodness, with a hint of sassy raspberry that keeps you coming back for more. It’s the dessert equivalent of that rom-com you secretly adore – comforting, predictable in the best way, and guaranteed to make you smile.
Ever since I started baking, I’ve been obsessed with cheesecakes. There’s something magical about that dense, creamy texture that just melts in your mouth. But I wanted to take the classic cheesecake and give it a modern twist, a little bit of pizzazz, a whole lotta pink. And thus, the Pink Velvet Raspberry Cheesecake was born!
This isn’t your grandma’s cheesecake (unless your grandma is super hip and into bright pink desserts, in which case, kudos to her!). This is a cheesecake for the Instagram generation, for the foodie who loves a good flavor combo, and for anyone who just wants a slice of happiness. Let’s dive into the recipe, shall we? Don’t worry, it’s easier than parallel parking (and probably more rewarding).
The Ingredients: Your Shopping List for Cheesecake Glory
Before we start, let’s gather our troops. Here’s what you’ll need to create this masterpiece:
- **For the Crust:**
- 1 ½ cups graham cracker crumbs (about 12 full sheets)
- 5 tablespoons unsalted butter, melted
- ¼ cup granulated sugar
- **For the Raspberry Puree:**
- 12 ounces fresh raspberries
- 2 tablespoons granulated sugar
- 1 tablespoon lemon juice
- **For the Pink Velvet Cheesecake Filling:**
- 32 ounces cream cheese, softened (that’s four standard packages)
- 1 ¾ cups granulated sugar
- 4 large eggs
- 1 cup sour cream
- 1 teaspoon vanilla extract
- 1 teaspoon red food coloring (gel is best for vibrant color!)
- ¼ cup all-purpose flour
Now, I know what you’re thinking: “Red food coloring? Really?” But trust me, that little splash of artificial color is what gives this cheesecake its signature pink hue. Think of it as the lipstick of the dessert world. If you’re staunchly against food coloring, you can try using beet juice, but be warned, it might slightly alter the flavor.
Making the Magic: Step-by-Step Instructions
Alright, let’s get baking! Here’s the breakdown:
Step 1: Prepare the Raspberry Puree (Because Patience is a Virtue)
In a saucepan, combine the raspberries, sugar, and lemon juice. Cook over medium heat, stirring occasionally, until the raspberries break down and the mixture thickens slightly (about 8-10 minutes).
Remove from heat and strain the mixture through a fine-mesh sieve to remove the seeds. This step is crucial for a smooth, luxurious puree. Let the puree cool completely while you prepare the rest of the cheesecake. Nobody wants a melted cheesecake!
Step 2: Crust Me, This is Important
Preheat your oven to 350°F (175°C).
In a medium bowl, combine the graham cracker crumbs, melted butter, and sugar. Press the mixture firmly into the bottom of a 9-inch springform pan. For extra stability, you can wrap the bottom of the pan with aluminum foil (this will help prevent leaks if you’re using a water bath).
Bake the crust for 8-10 minutes, or until lightly golden brown. Let it cool completely before adding the filling. A warm crust will melt the filling and nobody likes a soggy cheesecake.
Step 3: The Pink Velvet Dream
In a large bowl, beat the softened cream cheese and sugar until smooth and creamy. This is where you want to make sure there are no lumps! We’re going for a silky texture that’ll make you swoon.
Add the eggs one at a time, beating well after each addition. Be careful not to overmix, as this can incorporate too much air into the batter and cause the cheesecake to crack.
Stir in the sour cream, vanilla extract, and red food coloring. Mix until everything is evenly combined and you have a beautiful, vibrant pink batter.
Gently fold in the flour until just combined. Again, don’t overmix!
Step 4: Assemble and Bake (The Grand Finale)
Pour the pink velvet cheesecake filling over the cooled crust.
Spoon dollops of the raspberry puree over the filling. Use a knife or skewer to swirl the puree into the filling, creating a beautiful marbled effect. Get creative! This is your chance to unleash your inner artist (with cheesecake as your canvas).
To prevent cracking, bake the cheesecake in a water bath. To do this, wrap the bottom of the springform pan tightly with aluminum foil. Place the pan in a larger roasting pan and fill the roasting pan with hot water, about halfway up the sides of the springform pan.
Bake for 55-70 minutes, or until the edges of the cheesecake are set but the center still has a slight jiggle. Turn off the oven and let the cheesecake cool in the oven with the door ajar for at least an hour. This slow cooling process helps prevent cracking.
Step 5: Chill Out (Literally)
Remove the cheesecake from the water bath and let it cool completely on a wire rack. Once cooled, cover it with plastic wrap and refrigerate for at least 4 hours, or preferably overnight. This chilling time is essential for the cheesecake to set properly.
Step 6: Slice and Serve (The Moment of Truth)
Before serving, run a thin knife around the edge of the cheesecake to loosen it from the pan. Carefully remove the sides of the springform pan.
Slice the cheesecake and serve. Garnish with fresh raspberries, if desired. Prepare for the compliments to roll in!
Why This Recipe Rocks (Besides the Obvious Pinkness)
Okay, so we’ve covered the how-to. But why should you bother making this Pink Velvet Raspberry Cheesecake in the first place? Well, here’s the lowdown:
- **It’s a Showstopper:** Let’s face it, this cheesecake is gorgeous. The vibrant pink color and the swirls of raspberry puree make it a feast for the eyes. It’s the perfect dessert for special occasions or when you just want to impress your friends and family.
- **It’s Surprisingly Easy:** Don’t let the fancy name fool you. This recipe is actually quite straightforward. If you can mix ingredients and follow instructions, you can make this cheesecake.
- **It’s Bursting with Flavor:** The combination of the creamy cheesecake, the subtle velvet flavor (thanks to that little hint of food coloring), and the tangy raspberry puree is simply divine. It’s a flavor explosion that will leave you wanting more.
- **It’s Customizable:** Feel free to play around with the recipe and make it your own. Add different extracts, use different fruits, or even try a different crust. The possibilities are endless!
Troubleshooting Tips: Because Baking Isn’t Always Perfect
Even the best bakers have their off days. Here are a few common cheesecake problems and how to fix them:
- **Cracked Cheesecake:** This is probably the most common cheesecake problem. To prevent cracking, make sure to bake the cheesecake in a water bath and let it cool slowly in the oven. Also, avoid overmixing the batter.
- **Soggy Crust:** This can happen if the crust isn’t baked long enough or if the filling is too wet. To prevent a soggy crust, bake it until lightly golden brown and make sure to drain the raspberry puree well.
- **Lumpy Filling:** This usually happens if the cream cheese isn’t softened enough. Make sure to bring the cream cheese to room temperature before mixing it with the other ingredients.
- **Cheesecake Doesn’t Set:** This can happen if the cheesecake isn’t baked long enough or if it’s not chilled properly. Make sure to bake the cheesecake until the edges are set but the center still has a slight jiggle. Also, chill the cheesecake for at least 4 hours before serving.
With a little practice and these helpful tips, you’ll be a cheesecake pro in no time! So go ahead, give this Pink Velvet Raspberry Cheesecake a try. You won’t regret it!
Pink Velvet Raspberry Cheesecake: The Recipe Card
(You would include a printable recipe card here, summarizing the ingredients and instructions.)
Happy baking! And remember, life’s too short to eat boring desserts. Embrace the pink, embrace the raspberry, and embrace the deliciousness!
Conclusion for Pink Velvet Raspberry Cheesecake :
This Pink Velvet Raspberry Cheesecake is more than just a recipe; it’s an experience. The vibrant color, the tart raspberry, and the smooth, rich cheesecake combine to create an unforgettable dessert. Perfect for celebrations, special occasions, or simply treating yourself, this cheesecake is surprisingly easy to make and guaranteed to impress. So go ahead, bake up a slice of happiness! You deserve it, and your taste buds will thank you.
Print
Pink Velvet Raspberry Cheesecake
Delicious pink velvet raspberry cheesecake recipe with detailed instructions and nutritional information.
- Total Time: 35 minutes
- Yield: 4 servings 1x
Ingredients
- Cream cheese, softened 32 ounces
- Granulated sugar 1 1/2 cups
- Eggs 4 large
- Vanilla extract 1 teaspoon
- Pink food coloring gel 1 teaspoon
- Raspberry jam 1/2 cup
- Graham cracker crumbs 1 1/2 cups
Instructions
- Step 1: Preheat oven to 325°F (163°C). Prepare a 9-inch springform pan by wrapping the bottom tightly with aluminum foil.
- Step 2: In a large bowl, beat the softened cream cheese and sugar until smooth and creamy. Add the eggs one at a time, beating well after each addition. Stir in the vanilla extract and pink food coloring until evenly combined.
- Step 3: Gently swirl in the raspberry jam, being careful not to overmix.
- Step 4: Press the graham cracker crumbs into the bottom of the prepared springform pan to create a crust.
- Step 5: Pour the cheesecake batter over the graham cracker crust.
- Step 6: Bake in the preheated oven for 60-70 minutes, or until the center is just slightly jiggly. Turn off the oven and let the cheesecake cool inside for 1 hour. Remove from oven and refrigerate for at least 4 hours, or preferably overnight, before serving.
Notes
- Store leftover cheesecake tightly covered in the refrigerator for up to 5 days.
- To best enjoy a slice, let it sit at room temperature for about 15 minutes to soften slightly.
- Garnish each serving with fresh raspberries and a dollop of whipped cream for an elegant touch.
- For a smoother batter, ensure your cream cheese is fully softened and at room temperature before mixing.
- Prep Time: 15 minutes
- Cook Time: 20 minutes
- Method: Stovetop
- Cuisine: American
FAQs :
What makes this Pink Velvet Raspberry Cheesecake so special?
Okay, let’s be real. There are cheesecakes, and then there are *cheesecakes*. This Pink Velvet Raspberry Cheesecake falls firmly into the latter category. It’s got that gorgeous pink hue that screams “party,” the tangy raspberry swirl that’ll wake up your taste buds, and the creamy, dreamy cheesecake base that’ll make you want to abandon all diets immediately. It’s not just a dessert; it’s a conversation starter, a mood booster, and a guaranteed crowd-pleaser. Plus, no funny business with questionable ingredients. Just pure, delicious joy.
Can I use frozen raspberries for the raspberry swirl?
Absolutely! Frozen raspberries are your best friend when fresh ones are out of season (or when you’re feeling a bit…lazy). Just be sure to thaw them completely and drain off any excess juice before you blend them into the swirl. Nobody wants a watery cheesecake. A quick tip: simmering the thawed raspberries with a little sugar and lemon juice will intensify the flavor and create a thicker, more luscious swirl. Trust me, it’s worth the extra five minutes. Get ready for a raspberry explosion in every bite of your delicious dessert.
How do I prevent my Pink Velvet Raspberry Cheesecake from cracking?
Ah, the dreaded cheesecake crack! Fear not, my friend. A water bath is your secret weapon. Wrap the bottom of your springform pan in foil to prevent water from seeping in, then place it in a larger pan filled with about an inch of hot water. The gentle steam helps the cheesecake bake evenly and prevents it from drying out and cracking. Also, resist the urge to open the oven door while it’s baking. Temperature fluctuations are a cheesecake’s worst nightmare! Let it cool gradually in the oven with the door slightly ajar to avoid cracks.
Can I make this Pink Velvet Raspberry Cheesecake ahead of time?
You betcha! In fact, I highly recommend it. Cheesecakes are even better after they’ve had a chance to chill in the fridge for at least six hours, or even overnight. This allows the flavors to meld together and the texture to become even creamier. Just make sure to cover it tightly with plastic wrap to prevent it from drying out. When you’re ready to serve, let it sit at room temperature for about 15-20 minutes to soften slightly. And prepare for the accolades!

