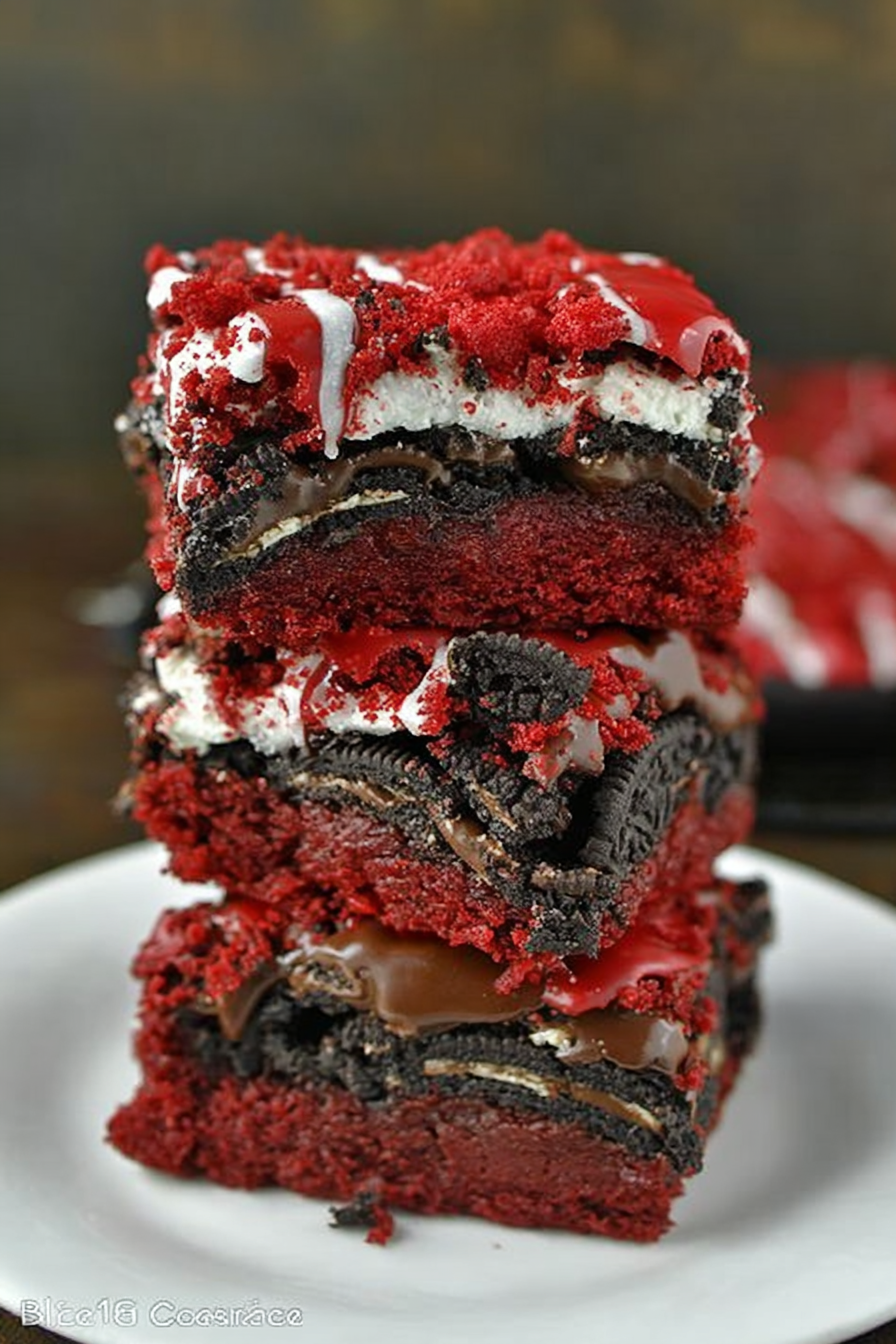
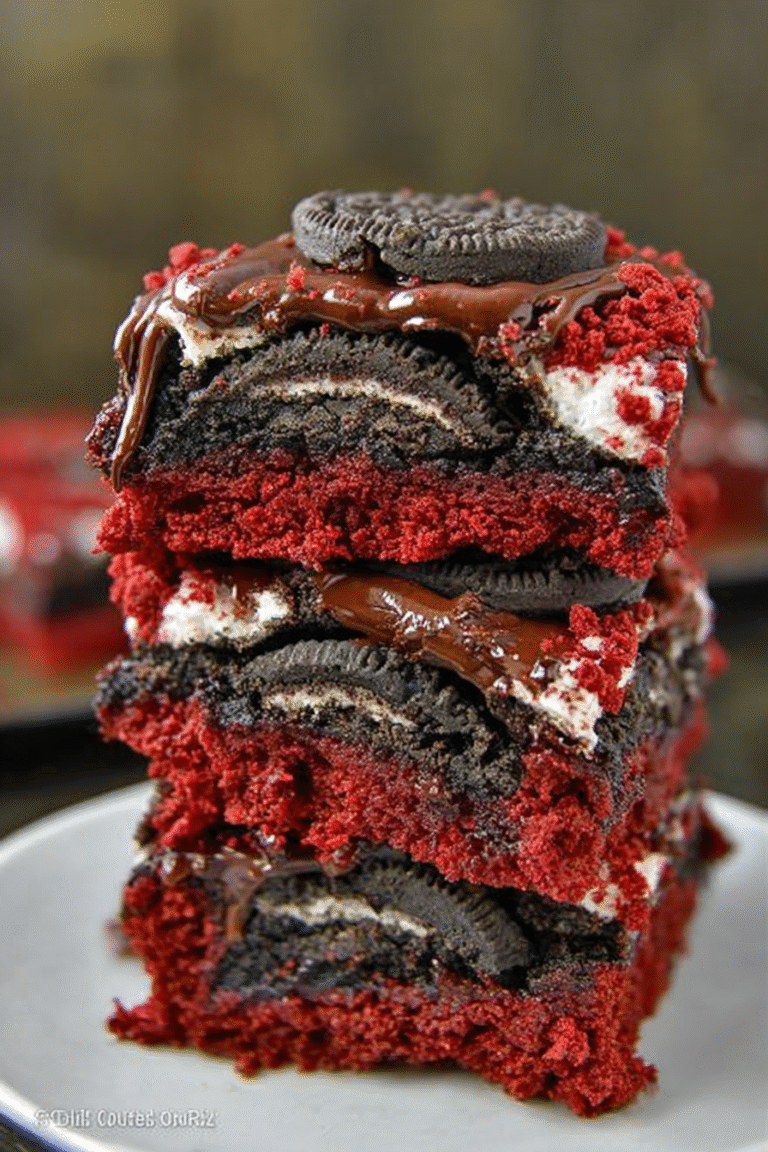
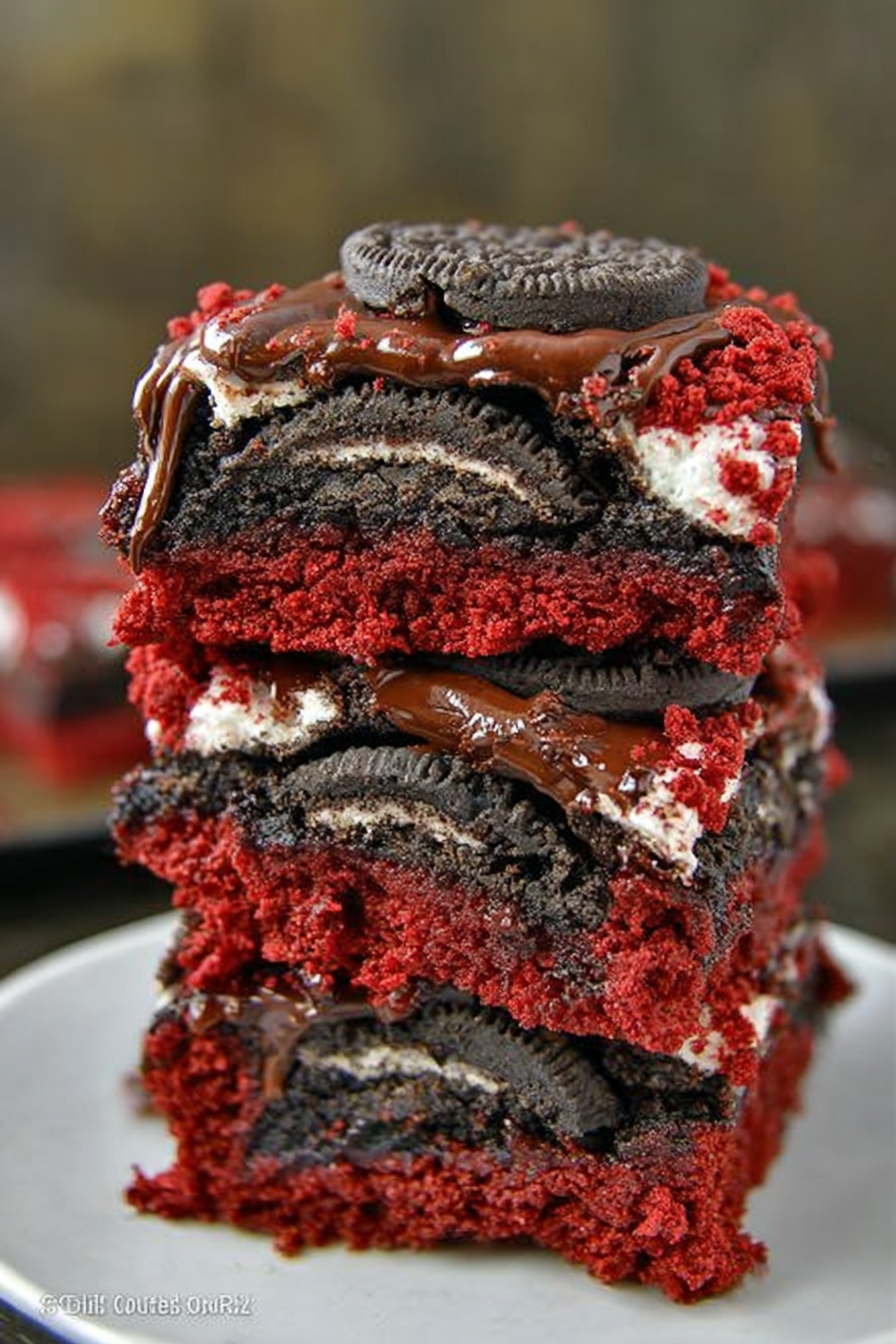
Imagine sinking your teeth into a warm, gooey brownie, its red velvet hue hinting at the decadent delight within. Then, BAM! A creamy, crunchy Oreo surprise explodes on your taste buds. These Oreo Stuffed Red Velvet Brownies are not just a dessert; they’re an experience.
Remember those days when you’d sneak an extra Oreo from the package? Well, now they’re baked right into the ultimate brownie. These treats are the perfect centerpiece for celebrations, a whimsical pick-me-up on a gloomy day, or just a reason to gather friends and share some serious bliss. Get ready for a flavor explosion that will have everyone begging for the recipe!
- Effortless to bake, even for kitchen newbies, these brownies come together in a snap, so relax and enjoy the process.
- The divine fusion of rich red velvet, creamy Oreo, and fudgy brownie creates a flavor symphony you will never forget.
- Their vibrant red color, speckled with Oreo goodness, makes them an eye-catching centerpiece for any dessert table.
- These brownies are fantastic on their own, or you can top them with vanilla ice cream to take them to the next level.
Ingredients for Oreo Stuffed Red Velvet Brownies
Here’s what you’ll need to make this delicious dish:
The full ingredients list, including measurements, is provided in the recipe card directly below.
How to Make Oreo Stuffed Red Velvet Brownies
Follow these simple steps to prepare this delicious dish:
Step 1: Preheat and Prep
Preheat your oven to 350°F (175°C). Grease and flour a 9×13 inch baking pan. This ensures the brownies don’t stick and come out easily.
Step 2: Mix Dry Ingredients
In a medium bowl, whisk together the flour, cocoa powder, red food coloring, baking soda, and salt. This ensures that everything is evenly distributed for the best flavor and texture.
Step 3: Combine Wet Ingredients
In a large bowl, beat together the sugar, oil, and eggs until smooth. Stir in the vinegar and vanilla essence (alcohol-free). This creates a smooth base for the brownie batter.
Step 4: Combine Wet and Dry
Gradually add the dry ingredients to the wet ingredients, mixing until just combined. Do not overmix. Overmixing can lead to tough brownies.
Step 5: Layer and Bake
Pour half of the batter into the prepared pan. Arrange the Oreo cookies in a single layer over the batter. Pour the remaining batter over the Oreos.
Step 6: Bake and Cool
Bake for 25-30 minutes, or until a toothpick inserted into the center comes out with moist crumbs. Let the brownies cool completely in the pan before cutting. This prevents them from falling apart.
Transfer to plates and serve these Oreo Stuffed Red Velvet Brownies with a scoop of vanilla ice cream for the perfect finishing touch.
Perfecting the Cooking Process

To make these decadent Oreo Stuffed Red Velvet Brownies efficiently, prep all ingredients first. Combine dry ingredients, then wet. Gently fold the wet into the dry. Layer batter, Oreos, then more batter. Bake until a toothpick comes out with fudgy crumbs.
Add Your Touch
Want to jazz up your Oreo Stuffed Red Velvet Brownies? Try using different Oreo flavors like Golden or Mint. Add chocolate chips or chopped nuts to the batter for extra texture. A swirl of cream cheese frosting on top adds a tangy twist.
Storing & Reheating
Store these delightful Oreo Stuffed Red Velvet Brownies in an airtight container at room temperature for up to three days. For longer storage, refrigerate them for up to a week. Reheat in the microwave for a few seconds to restore their warm, gooey goodness.
Here are some helpful tips for making these brownies amazing:
- Don’t overmix the batter! Overmixing develops the gluten, resulting in tough brownies, not the fudgy treats we crave.
- Line your baking pan with parchment paper. This makes removing the brownies easy and prevents sticking, ensuring perfect squares.
- Let the brownies cool completely before cutting. This allows them to set properly, resulting in cleaner slices and a better texture.
(Personal anecdote formated as paragraph subheading)
I remember making these for a friend’s birthday. Everyone raved about them, and someone even asked if I’d opened a bakery. It was the perfect sweet treat for a celebration!
The Alluring Appeal of Red Velvet
Red velvet. Just the name evokes a sense of luxury, doesn’t it? It’s not quite chocolate, not quite vanilla, but something mysteriously in between. It’s the dessert equivalent of that one friend who always looks effortlessly chic, even in sweatpants. And when you combine that alluring allure with the simple, nostalgic pleasure of an Oreo? Fireworks. Culinary fireworks, people! We’re talking about taking the everyday brownie and elevating it to a dessert experience worthy of royalty, or at least, your next Netflix binge. Think of these Oreo Stuffed Red Velvet Brownies as a love letter to your taste buds, a sweet sonnet composed of cocoa, cream, and a whole lot of awesome.
Why These Brownies Are About to Become Your New Obsession
Let’s be honest, baking can be intimidating. Flour explosions, sunken cakes, and the dreaded “are-these-done-yet?” anxiety. But fear not, intrepid baker! This recipe is practically foolproof. We’re talking about a recipe so simple, it could be taught to a moderately intelligent golden retriever. Okay, maybe not, but you get the idea. These Oreo Stuffed Red Velvet Brownies are quick, easy, and guaranteed to impress. Plus, they’re customizable. Feeling adventurous? Throw in some white chocolate chips! Craving a little crunch? Add some chopped pecans! The possibilities are as endless as your imagination… and your pantry. This recipe will make you the star baker in your family. Prepare for requests and standing ovations. You have been warned.
The Secret to the Perfect Red Velvet Flavor
The key to that distinctive red velvet flavor lies in the combination of cocoa powder and vinegar (or in this case, a vinegar alternative!). The vinegar reacts with the cocoa, enhancing its flavor and giving the brownies that characteristic tang. But don’t worry, you won’t taste vinegar outright! It’s a subtle undertone that adds depth and complexity. Now, some recipes call for red food coloring, and while that’s perfectly fine, I prefer to use beetroot powder for a more natural hue. It gives the brownies a beautiful reddish tint without any artificial ingredients. Of course, the choice is yours! Whether you go with traditional food coloring or embrace the power of beetroot, the end result will be delicious. Remember: a little patience goes a long way.
Gathering Your Arsenal: Ingredients for Oreo Stuffed Red Velvet Brownies
Before we embark on this baking adventure, let’s gather our supplies. Here’s what you’ll need to transform your kitchen into a red velvet wonderland:
- **All-purpose flour:** The foundation of our brownies. Make sure it’s fresh!
- **Cocoa powder:** For that signature chocolatey depth. Use unsweetened for best results.
- **Baking soda:** Our leavening agent, helping the brownies rise to their full potential.
- **Salt:** A pinch to balance the sweetness and enhance the flavors.
- **Granulated sugar:** For sweetness and that perfect chewy texture.
- **Unsalted butter:** Melted and cooled, adding richness and moisture.
- **Eggs:** Binding everything together and adding structure.
- **Vanilla essence (alcohol-free):** A splash of vanilla enhances all the other flavors.
- **Buttermilk:** The secret ingredient for a moist and tender crumb. If you don’t have buttermilk, you can make your own by adding a tablespoon of lemon juice to a cup of milk.
- **White vinegar:** Reacts with the cocoa powder, creating that tangy red velvet flavor.
- **Red food coloring (optional):** For that vibrant red hue. Or beetroot powder.
- **Oreo cookies:** The star of the show! Use your favorite flavor.
- **Chocolate chips (optional):** Because why not?
Step-by-Step Guide to Oreo Stuffed Red Velvet Brownie Bliss
Alright, bakers, let’s get down to business! Here’s the detailed breakdown of how to create these delectable Oreo Stuffed Red Velvet Brownies. I promise, it’s easier than parallel parking.
1. **Preheat and Prep: ** Preheat your oven to 350°F (175°C). Grease and flour a 9×13 inch baking pan. This prevents sticking and ensures easy removal. Alternatively, line the pan with parchment paper, leaving an overhang for easy lifting.
2. **Combine Dry Ingredients: ** In a medium bowl, whisk together the flour, cocoa powder, baking soda, and salt. This ensures everything is evenly distributed.
3. **Mix Wet Ingredients: ** In a large bowl, combine the melted butter, sugar, eggs, vanilla essence (alcohol-free), buttermilk, vinegar, and red food coloring (if using). Beat until smooth and well combined.
4. **Combine Wet and Dry: ** Gradually add the dry ingredients to the wet ingredients, mixing until just combined. Be careful not to overmix, as this can lead to tough brownies.
5. **Layer Time: ** Pour half of the brownie batter into the prepared pan. Arrange the Oreo cookies in a single layer over the batter. Pour the remaining batter over the Oreos, spreading it evenly.
6. **Bake to Perfection: ** Bake for 25-30 minutes, or until a toothpick inserted into the center comes out with fudgy crumbs.
7. **Cool and Enjoy: ** Let the brownies cool completely in the pan before cutting into squares. This allows them to set properly and prevents them from crumbling.
Essential Tools You’ll Need
Having the right tools can make all the difference in your baking endeavors. Here’s a list of essentials for making Oreo Stuffed Red Velvet Brownies:
- **Mixing bowls:** For combining wet and dry ingredients.
- **Whisk:** For blending dry ingredients and incorporating air.
- **Electric mixer (optional):** For creaming butter and sugar, and for achieving a smooth batter.
- **Measuring cups and spoons:** For accurate measurements, ensuring consistent results.
- **9×13 inch baking pan:** The perfect size for these brownies.
- **Parchment paper (optional):** For easy removal and cleanup.
- **Toothpick:** For testing doneness.
Troubleshooting Your Oreo Stuffed Red Velvet Brownie Adventure
Even the best bakers encounter occasional hiccups. Here’s a quick guide to troubleshooting common brownie problems:
- **Brownies are too dry:** You may have overbaked them or used too much flour. Reduce the baking time slightly and make sure your measurements are accurate.
- **Brownies are too cakey:** You may have overmixed the batter or used too much baking soda. Be gentle when mixing and follow the recipe carefully.
- **Brownies are not red enough:** You may need to add more red food coloring or use beetroot powder.
- **Oreos are sinking to the bottom:** The batter may be too thin. Try chilling the batter for 15-20 minutes before layering.
- **Brownies are sticking to the pan:** Make sure to grease and flour the pan thoroughly or use parchment paper.
(Personal anecdote formated as paragraph subheading)
Once, I accidentally used salted butter instead of unsalted. The brownies were still delicious, but they had a slightly salty kick. It was surprisingly good!
Oreo Stuffed Red Velvet Brownies: Variations and Twists
Ready to get creative? Here are some fun variations and twists on the classic Oreo Stuffed Red Velvet Brownies:
- **Cream Cheese Swirl:** Swirl cream cheese frosting over the top of the batter before baking for a tangy and decadent twist.
- **Peppermint Crunch:** Add crushed peppermint candies to the batter for a festive holiday treat.
- **Peanut Butter Cup:** Replace the Oreos with peanut butter cups for a peanut butter and chocolate explosion.
- **Salted Caramel:** Drizzle salted caramel sauce over the baked brownies for a sweet and salty delight.
- **Espresso Infusion:** Add a teaspoon of espresso powder to the batter for a mocha-flavored brownie.
(Personal anecdote formated as paragraph subheading)
One time, I added a dash of cinnamon to the batter and it gave the brownies a wonderful warmth. Experimenting is key to finding your perfect flavor combination!
Conclusion for Oreo Stuffed Red Velvet Brownies :
These Oreo Stuffed Red Velvet Brownies are a delightful treat, perfect for satisfying any sweet craving. Combining the moist, tangy red velvet with the creamy, crunchy Oreos creates a symphony of flavors and textures that’s simply irresistible. Easy to make and customizable, these brownies are guaranteed to be a hit at any gathering. So, bake up a batch, share with friends, and enjoy the blissful indulgence of this irresistible dessert.
Print
Oreo Stuffed Red Velvet Brownies
Delicious oreo stuffed red velvet brownies recipe with detailed instructions and nutritional information.
- Total Time: 35 minutes
- Yield: 4 servings 1x
Ingredients
- 1 box (15.25 oz) red velvet cake mix
- 1/4 cup vegetable oil
- 2 large eggs
- 1/4 cup water
- 1/2 cup semi-sweet chocolate chips
- 1 package (14.3 oz) Oreo cookies
Instructions
- Step 1: Preheat oven to 350°F (175°C) and grease a 9×13 inch baking pan.
- Step 2: In a large bowl, combine the red velvet cake mix, vegetable oil, eggs, and water. Mix well until smooth and fully combined.
- Step 3: Gently fold in the chocolate chips.
- Step 4: Pour half of the brownie batter into the prepared baking pan.
- Step 5: Arrange the Oreo cookies in a single layer on top of the batter.
- Step 6: Carefully pour the remaining brownie batter over the Oreo cookies, spreading evenly.
- Step 7: Bake for 25-30 minutes, or until a toothpick inserted into the center comes out with moist crumbs. Let cool completely before cutting into squares.
Notes
- Store cooled brownies in an airtight container at room temperature for up to 3 days, or in the refrigerator for up to a week.
- For a warm, gooey treat, microwave a brownie square for 10-15 seconds before serving.
- Serve these decadent brownies with a scoop of vanilla ice cream for the ultimate indulgence.
- To prevent Oreos from sinking, gently press them into the first layer of batter rather than just laying them on top.
- Prep Time: 15 minutes
- Cook Time: 20 minutes
- Method: Stovetop
- Cuisine: American
FAQs :
Can I use a different type of cookie besides Oreos for these Oreo Stuffed Red Velvet Brownies?
Absolutely! While Oreos add a classic creamy crunch, feel free to experiment with your favorite cookies. Chocolate chip cookies, peanut butter cookies, or even shortbread would be delicious nestled inside these red velvet brownies. Just make sure the cookies are relatively flat so they bake evenly within the brownie batter. Get creative and customize these treats to your liking! Imagine the possibilities with different cookie-brownie combinations. You might discover your new favorite dessert by simply swapping out the Oreo.
How do I prevent the Oreos from sinking to the bottom of the Oreo Stuffed Red Velvet Brownies?
That’s a great question! To prevent Oreo sinking, you can partially bake the brownie batter for about 10 minutes before adding the Oreos. This creates a slightly firmer base that will support the cookies. Another trick is to gently press the Oreos into the batter, ensuring they’re evenly distributed. Don’t push them all the way to the bottom! Remember, a little patience goes a long way when baking these decadent treats.
Can I make these Oreo Stuffed Red Velvet Brownies ahead of time?
Yes, you definitely can! These brownies are perfect for making ahead. Once baked and cooled completely, you can store them in an airtight container at room temperature for up to three days. You can also freeze them for longer storage. Just wrap them individually in plastic wrap and then place them in a freezer-safe bag. When ready to enjoy, thaw them at room temperature. The flavor and texture will remain fantastic, making these Oreo-stuffed delights a convenient dessert option.
What’s the best way to get clean cuts when slicing the Oreo Stuffed Red Velvet Brownies?
Patience is key! Allow the brownies to cool completely before slicing. Using a sharp, non-serrated knife is crucial. For extra clean cuts, run the knife under hot water and wipe it dry between each slice. This helps prevent the brownies from sticking to the knife. You can also chill the brownies in the refrigerator for an hour or two before slicing. This firms them up, making them easier to cut into neat, even squares.

